Origami Classics
Monday, April 4, 2011
Difficulty Levels
We have now covered each of the main folds and used several examples on how to fold them. You should be ready to try some of the other models on this website. To help you, I have given a difficulty rating for each of them. This is based on both the OUSA difficulty system and that used in most of John Montroll's origami books.
One star : 
- These models are the simplest ones on this site. They correspond to the OUSA classifications of simple and low intermediate.
Two stars : 

- These models are moderately difficult and should not really be attempted by beginners to origami. They correspond to the OUSA classification of intermediate.
Three stars : 


- These models are fairly difficult and should only be attempted by those who are fairly comfortable with folding. Some stages are quite tricky. They correspond to the OUSA classification of high intermediate.
Four stars : 


- These models are difficult to fold, either due to difficult sequences, a large number of delicate folds, or due to the thickness of the paper achieved. Only experience folders should have a go, and large sheets of paper are best used or the model will frequently tear or collapse. They correspond to the OUSA classification of complex.
Until now, most of the models have been one star difficulty.
Origami Basics 11
The sink fold
A sink fold is made when the centre of the paper is folded inside the rest of the model. You may have to unfold some of the model to accomplish this. Once you have made the fold, everything usually pops back into place. A thick arrow usually shows you where to push with your finger. This can sometimes be very difficult, so don't be afraid to unfold as much of the model as you need to.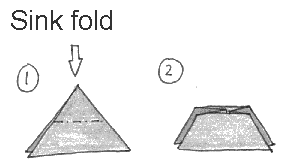
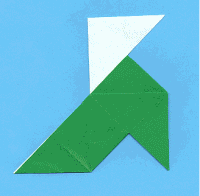 | This is one version of how to fold a Pajarita, a traditional Spanish model sometimes called a Hobby-horse in the West. It starts by using a waterbomb base. The sink in step 2 is good practise to learn how to sink fold. A tricky outside reverse fold is required in step 8. |
Origami Basics 10
The Frog base.
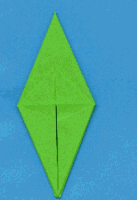 | This base is more complicated than the previous ones. As well as having several squash folds, you have several petal folds, too. The base itself has four long points, four short flaps and a long central point. |
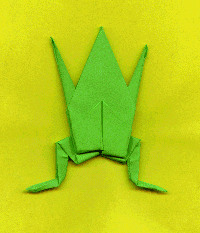 | The traditional frog uses the frog base and several reverse folds to form the legs. The final step involves blowing into a hole at the bottom and inflating the model. I think that the frog looks rather nice as it is however. Inflating it also looks a little rude, too. |
Origami Basics 9
The Petal fold and the Bird base
In a Petal fold, a layer is lifted, opened up and flattened. It usually consists of two mountain folds and a valley fold.
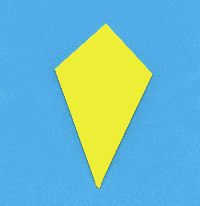 | The Bird base is probably the most commonly used base in origami. It starts off with a preliminary base, and both sides are then Petal folded upwards. This creates a base with four long points that can be folded into many different forms. |
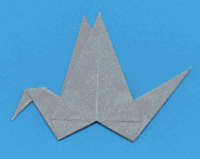 | The flapping bird is one of the most well-known origami models. After folding the bird base, three more folds create the flapping bird. To get it to flap properly, you will need to curl the wings slightly. Rub your thumb along the outside of them. If you hold where shown, pulling the tail causes the wings to flap. |
Origami Basics 8
The Double Rabbit ear fold
This fold is a bit like bending a drinking straw in half. It is used to narrow a triangular flap to produce a much thinner flap. It is a good way to create thin legs on an animal.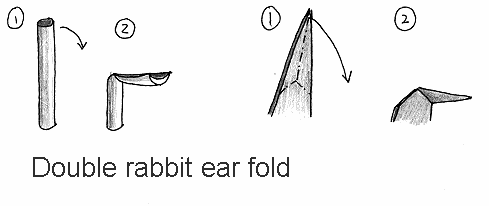
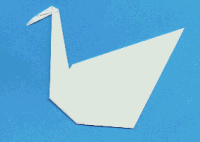 | To practise this fold, here is a variation of a traditional origami swan. The crease in step 3 should make it easier to complete the Double rabbit ear fold. An inside reverse fold is also used to form the head. |
Origami Basics 7
The Rabbit ear fold and the Fish base
In a rabbit ear fold, a corner of the paper is pinched in half to form a new point. This looks a little bit like a rabbit's ear.
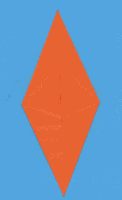 | The Fish base uses two rabbit ear folds. It has two long flaps and two short flaps that can be folded. |
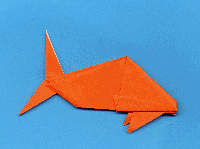 | This simple fish model uses several of the folds that you have learnt so far. As well as folding the fish base to start, you will need so fold some reverse folds to create the tail properly. Use a large sheet of paper to start with or the head may split open as you fold step 6, a rather difficult reverse fold. |
Subscribe to:
Posts (Atom)